13 Aug Subsurface Drip Irrigation Installation
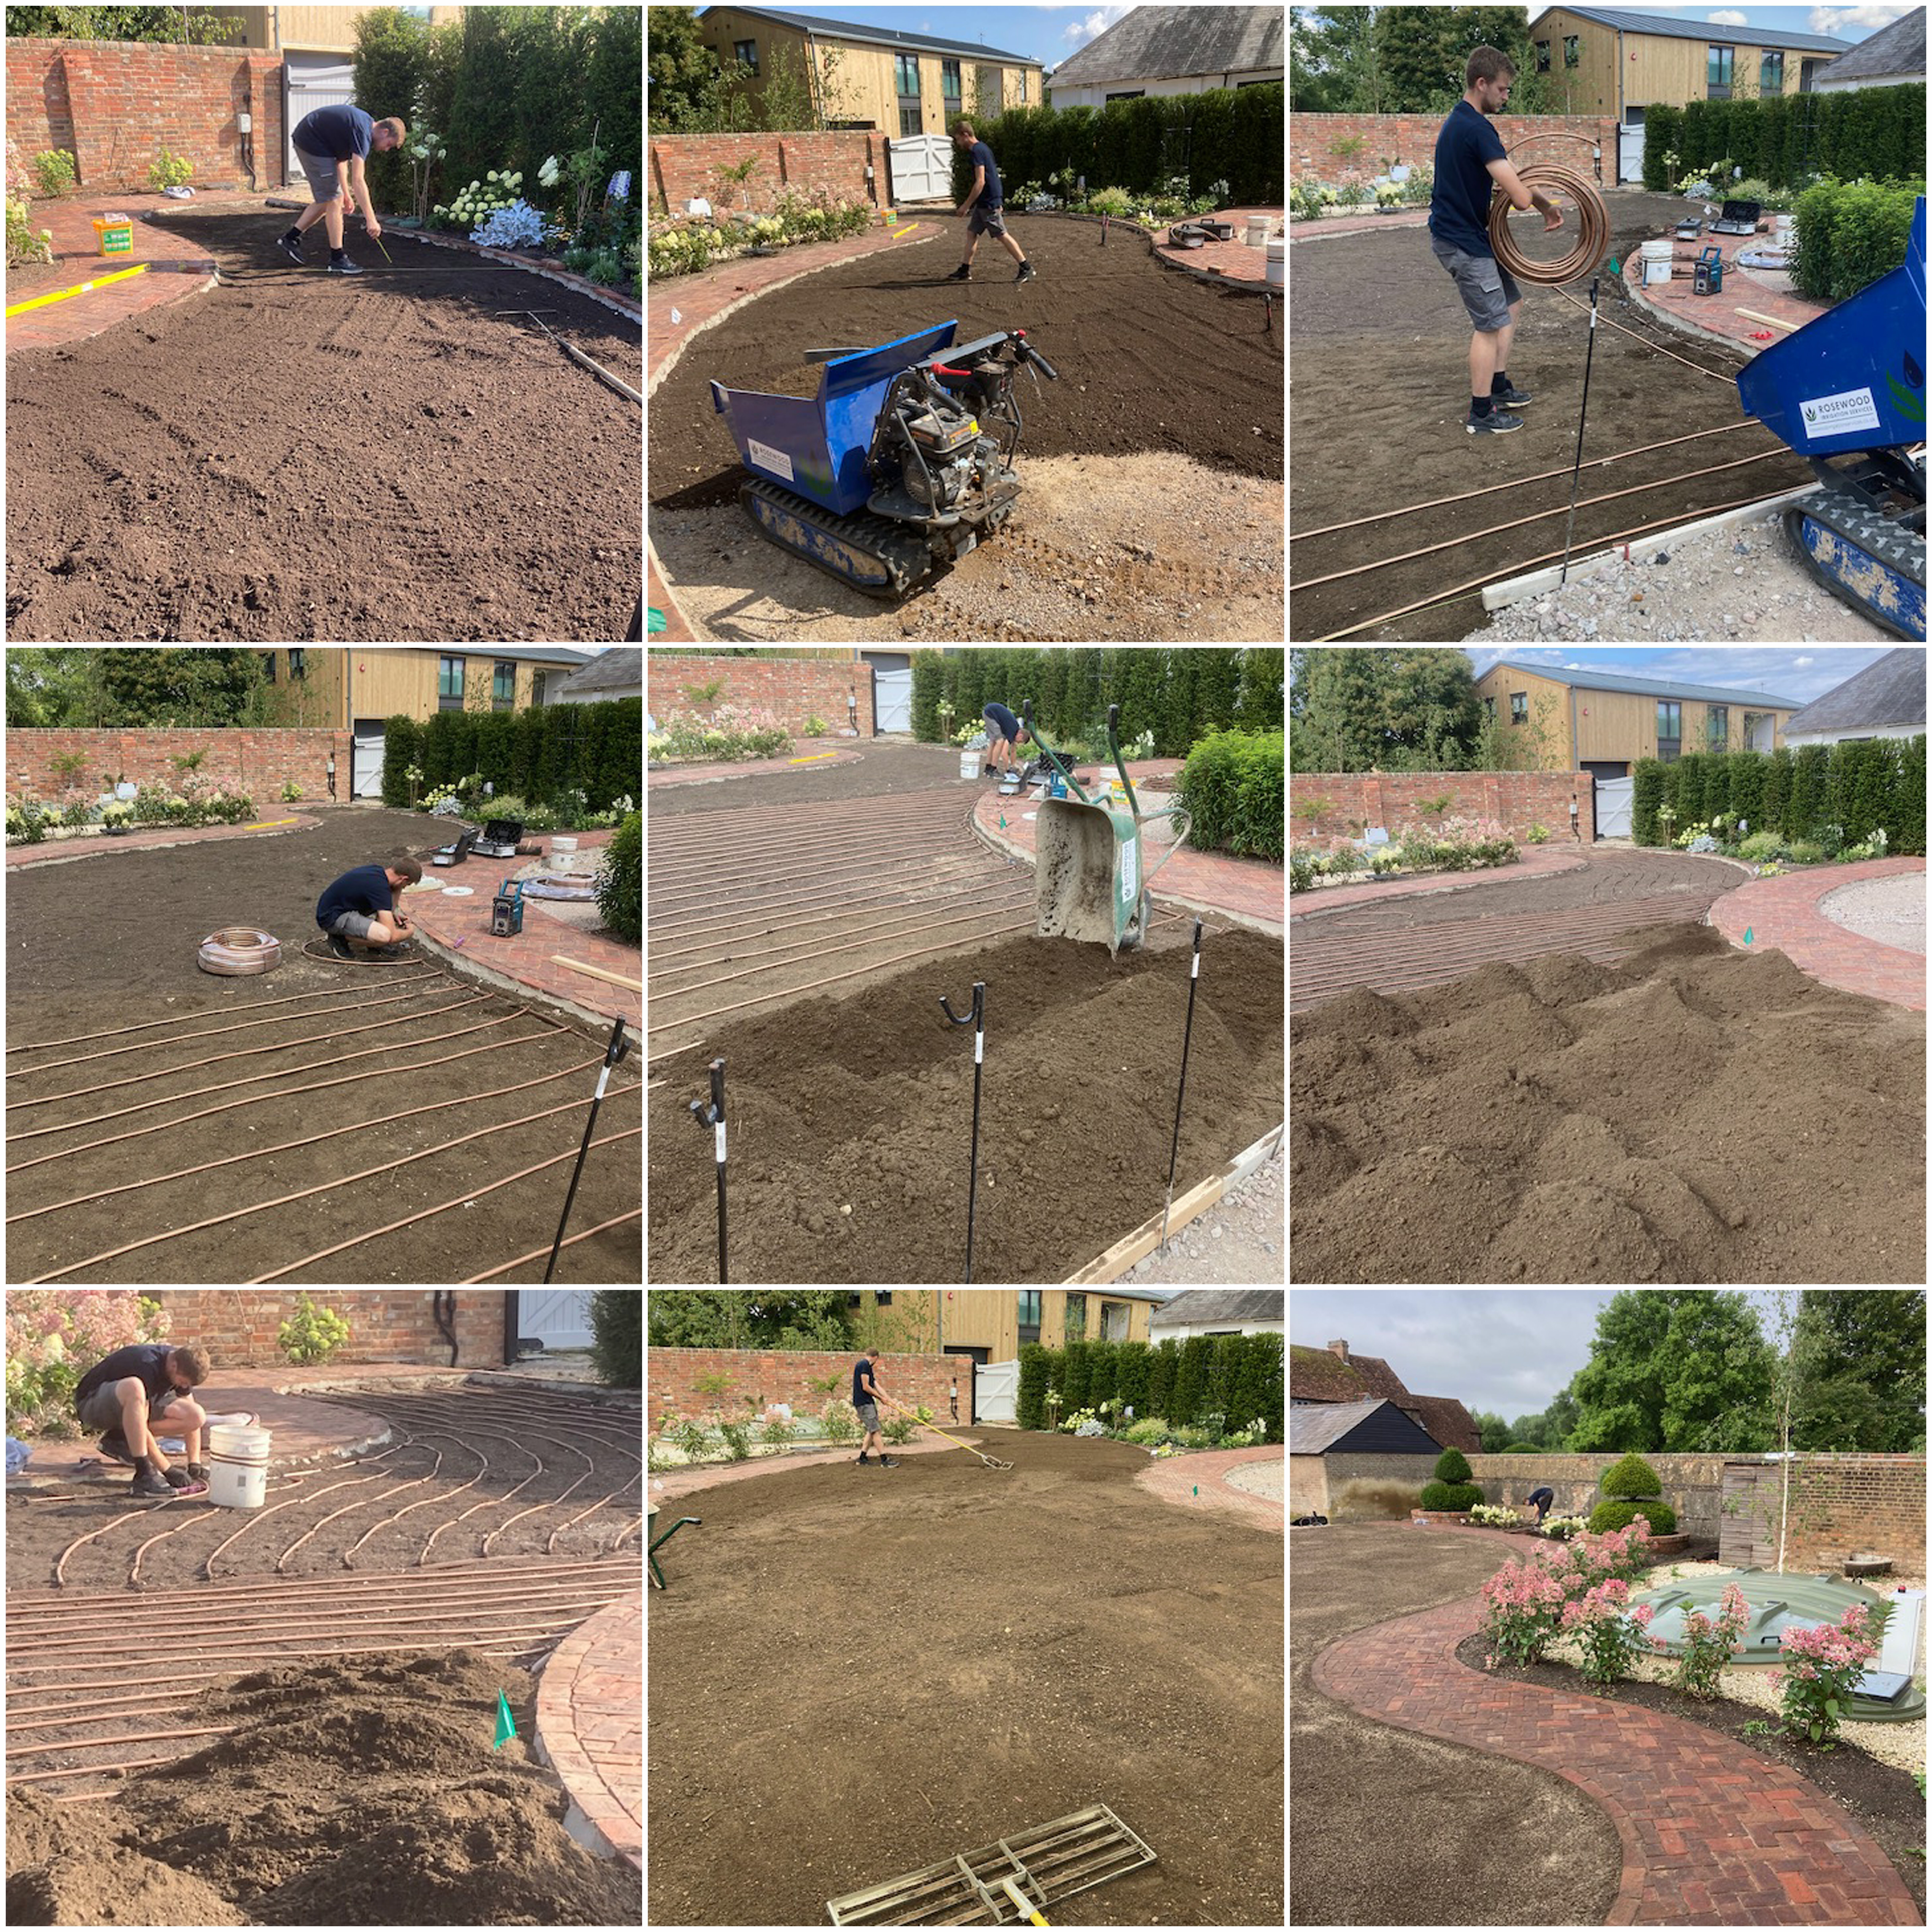
At a recent job, we installed dripline as part of creating a new lawn area. We took a series of photos so we could share the whole of the subsurface drip irrigation installation process with you.
Laying the dripline
The first task was to prepare a base layer of topsoil. We put this down over the hard ground and spread it evenly over the area that would be lawn. Next, our team laid the dripline itself. The hose has holes at regular intervals along its length, emitting small amounts of water right the way along. We work to a predesigned layout, making sure of even coverage. That way, every inch of the ground will end up evenly soaked.
After laying the hose, a further layer of topsoil is needed. At every stage, we ensure that each layer is level, and this is no exception. Our trusty mini-dumper puts piles of soil in place, which get spread out evenly to an exact depth of 100mm. Once the topsoil is in place, we level it with a loot, leaving it ready for the final stage.
Creating the lawn
What’s the final stage? It’s seeding the area with grass seed, which will be watered by the new subsurface dripline irrigation, so that it gets a great start. The lawn is far more likely to establish itself successfully, and thrive, thanks to the invisible subterranean watering system! Don’t forget also, that dripline is by far the most efficient way to water your plants, using up to 90% less water than manual means. It’s so efficient, that it’s exempt from hosepipe bans, so you’re doing your bit for the environment as well as keeping your garden healthy!
So, if you’re keen to know more, give Rosewood a call, or use our website Contact Form to send us a message. Our friendly team in the office will answer any questions, and we can set up a no-obligation quotation appointment to design irrigation tailored exactly to your garden.

